When word of the following guide made its way to the PlayStation LifeStyle staff, a sense of awe and wonder was in the air. Written by BitRunner, the following guide details the extensive process of putting high-quality images on your Home picture frames. The guide is extensive and straightforward, and we have it for you in its entirety.
We hope you enjoy it as much as we did.
Intro
I’m going to cover one of the best known methods to get great quality out of your Picture Frames. The tutorial that I will be covering will expressly cover how to do it in Adobe Photoshop or Adobe Photoshop Elements, but the same results can be achieve in other paint programs such as Paint Shop Pro, Gnu Image Manipulation Program (free), or Paint.NET (free) just to name a few. I will also be covering how to do this in Landscape mode, but I will explain what you need to do in order to achieve the same results in Portrait mode as well.
Method
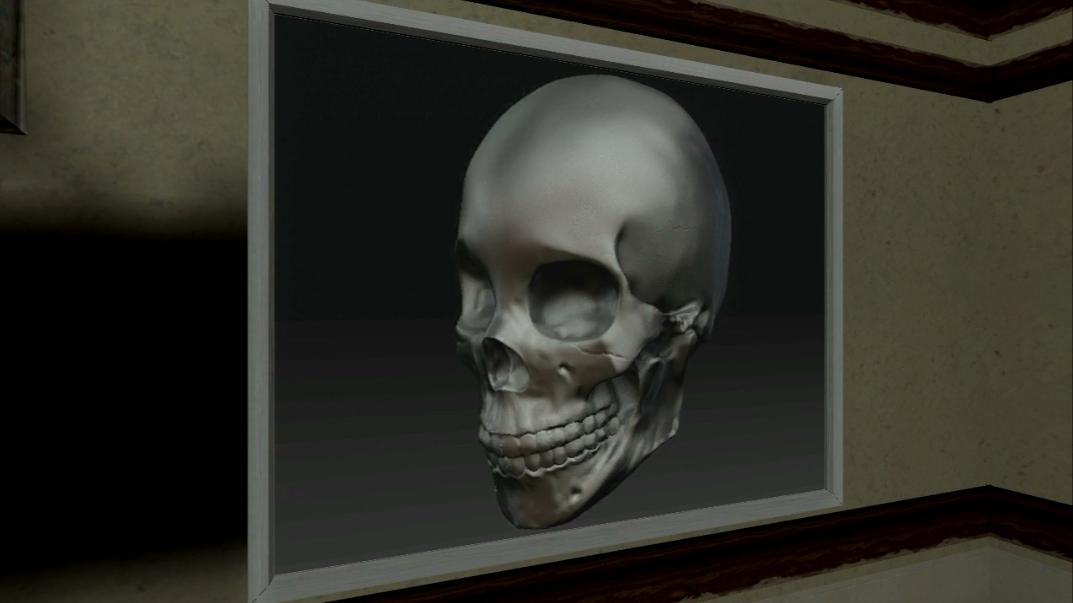
So I’ve got this sweet image of a 3d skull head on my hard drive (Fig 1), it actually came out of a book on 3d sculpting I’ve been reading. I want to throw this up on a Picture Frame, but if I do it as it is right now, the picture will look grainy and won’t be scaled right when I post it up. I need to do a little work beforehand to get it ready.
Figure 1) Pretty cool eh?
(No that’s not my own work, if only I could sculpt that good!)
Essentially we’ll do 3 things:
- Objective 1: scale your picture up or down to 669×512 for a landscape picture, or 512×669 for a portrait
- Objective 2: squish the picture down (nonuniformly) to 512×512
- Save the image as a PNG and copy to your PS3
Objective 1: (scale your picture to 669×512 for landscape mode, or 512×669 for portrait mode)
The first objective is that I to determine which mode I want to use, Landscape or Portrait. For this exercise, I’m going to be doing Landscape. So the first step I need to do (after some mathematical wizardry from the Complete Guide thread that I won’t post here), is to get my picture into a size of 669×512.
1) First let’s make sure we’re in RGB mode. Go to Image -> Mode and select RGB Color if it’s not already selected.
2) Now we’re going to scale the image down and try to get it as close to 669×512 as we can. Open up Image -> Image Size and we’ll set some options.
- Make sure Constrain Proportions is checked
- Make sure Resample Image is checked, and choose Bicubic Sharper for the best quality. You may also play with other resampling algorithms to see which gives you the best results.
- Now, considering that the image is larger than 669×512, what I’ll do is scale it on the shortest axis (height), down to 512. When Constrain Proportions is checked, the width will also scale down to 729 here, which is close to what we need (see Figure 2).
- Once I’m all done my image will look like Figure 3.


Figure 2) Image Resize dialog in Photoshop, with comments on what to do.
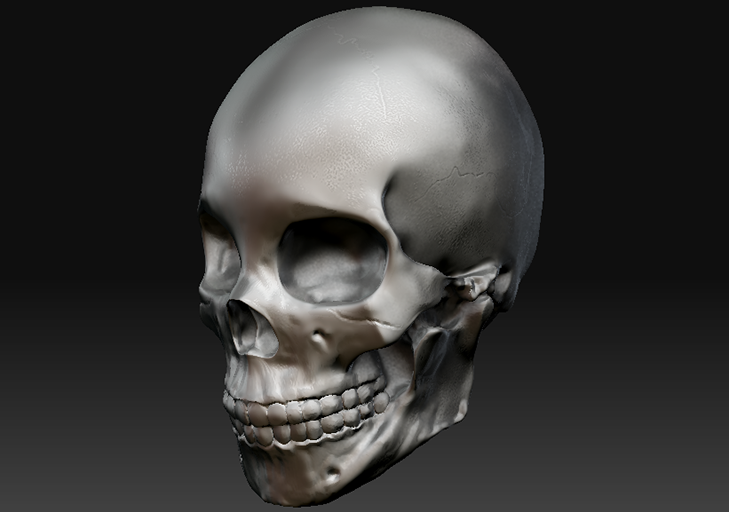
Figure 3) Now the picture is down to 729×512, so I just need to do a little more cropping to get it down to 669×512.
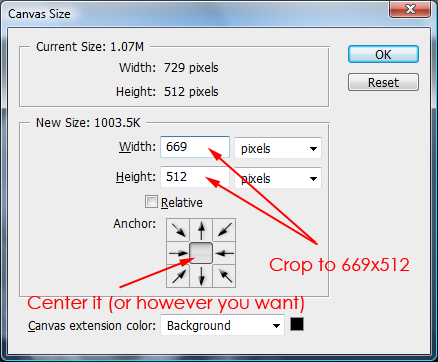
3) Now we’re close, we’re at 729×512 pixels. I still need to get it down to 669×512 though, so I’ll crop the image. You can either do this manually with the Crop tool, which may get tedious, or you can just open up the Canvas Size dialog. It’s under Image -> Canvas Size. (Figure 3) I’ll simply center the image on the Anchor, and choose 669×512 for my new image size.
Figure 4) The Canvas Size dialog.
Objective 2 (squish the image to 512×512)
4) Now I’m going to squish my image on the horizontal axis to 512×512 to fit the Picture Frame texture size. I’ll open up Image Resize again as I did in step 2 above. I’ll uncheck Constrain Proportions, and change the Width to 512. See Figure 5 if you’re stuck. Your final result should look like Figure 6.
Figure 5) Last image size you need to do to scale it down to 512×512.
Figure 6) Final 512×512 image that I’ll upload to my Picture Frame. Yes, it’s supposed to look squished like that. I’ll be sure and give him some ibuprofen for the pain.
Final – (Saving the image)
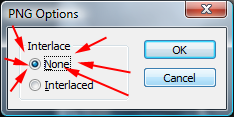
If you need to, go to Layer -> Flatten Image. Now choose File -> Save As and for the format type try PNG for the best quality. When the PNG Options dialog pops up choose None for Interlace type (Figure 7).
Figure 7) Just say no to Interlaced.
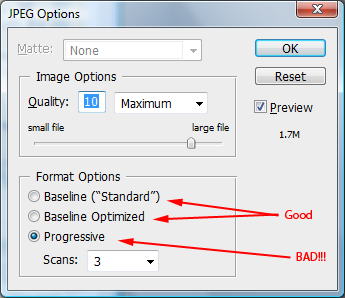
A note about saying in JPG: I recommend against saving in JPG as it degrades quality, but if you’re absolutely bent on doing so as some are, just take note of one thing (see Figure 8)… when saving as a JPG be sure and *NOT* use Progressive under Format Options, use a Baseline format, or Home will have problems with your Picture Frame in some cases.
Figure 8) JPEG Options
Once you’re done, go throw it up on your Media Server or put it on Memory Stick, or however you want to get it over to the PS3. Copy over the image, load up Home, and then put it on a Picture Frame. Once you do, rotate it where you want to (use Move to rotate the frame). Now use the Edit option and make sure Filled mode is used, and use L2/R2 to rotate the image within the frame how you want from within the Edit dialog.
Results
See for yourself, that’s not too bad at all. The quality does get degraded somewhat due to the texture quality of the frames themselves, but as long as you start with a clean image (which is why I recommend PNG over JPG), you will come out ok in the end and have great looking results that don’t have heavy pixelation.
One thing to notice is that soft gradients like the verticle black to grey in the background I showed here have a tendency to cause “banding”, so be a bit cautious of that fact when creating images. This is in a large part on account of the texture quality being lowered when you upload it to a frame. Otherwise, the contours come out very well and you can see detail on the image without worrying about pixelation.
Technical (skip this section if you don’t care to know all the details)
The necessitation for the “interlacing” effect described above is not a fault of Home as much as it is the OpenGL standard. With OpenGL your textures must be powers of 2 (i.e. 64×64, 128×128, 256×256, 512×512, etc). By making the image first 669×512, then squishing it to 512×512, the Filled texture will recorrect itself for aspect ratio, but you will lose some pixels in the process due to the interlacing effect. If you really care about having pixel-by-pixel accuracy, you can resize your pictures to 512×392 or 392×512 and then center it on a 512×512 image, and then choose Cropped mode on the Edit dialog for the Picture Frame. However, by doing so you’ll effectively have less pixels to work with, and it’ll also stretch them on the shorter axis. Really, the two methods come out looking close to the same in most situations, but you’ll get more pixels out of the 669×512/512×669 solution.


[Source]