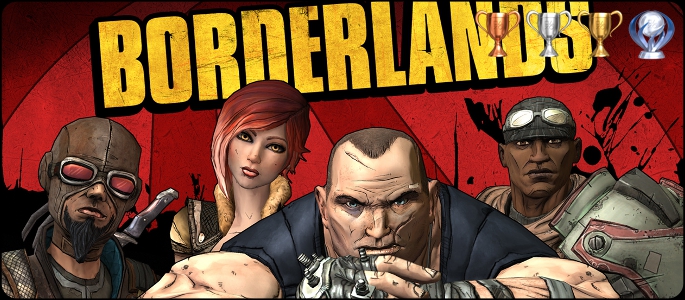
is an addicting FPS RPG fusion game with millions of weapons and an easy platinum to earn. Despite the ease, we thought it might be handy if you had some tips and a guide to help you kill what you need, so you can get back to finding more loot!
Borderland Defender (Platinum) –You have defeated all bosses and are a powerful force to be reckoned with
Collect all other trophies (not including DLC related trophies)
Paid in Fyrestone (Bronze) – Completed 5 missions in the Arid Badlands
Simply complete the first five missions in the game and this trophy should pop right up.
Made in Fyrestone (Bronze) – Completed all missions in the Arid Badlands
Complete all missions from the Fyrestone bounty board, Dr. Zed, T.K. Baha, and Scooter in New Haven. There are a few missions found midway through the game in New Haven that require going back to the Arid Badlands, check for these if the trophy hasn’t popped.
Paid in New Haven (Bronze) – Completed 5 missions in the Rust Commons
Can’t be missed, at least 5 Rust Commons missions must be completed during the story line.
Made in New Haven (Bronze) – Completed all missions in the Rust Commons
Complete all New Haven missions (bounty board, Scooter, Helena Pierce, Marcus, and Claptrap), Rust Commons West missions (Tannis), and Rust Commons East missions (bounty board)
My Brother is an Italian Plumber (Bronze) – Killed an enemy plumber-style
The obvious reference to Mario requires killing an enemy by jumping on his head. Most easily done with low level skags early in the game by shooting them a few times so they have low health, and then jumping on their heads.
12 Days in Pandora (Bronze) – Mastered the technology of Pandora
This is one of the many challenges in the game, which can be found by going to your quest list and pressing triangle once. Here you can see the current tallies for how far you are in any challenge, including 12 Days in Pandora. This one’s requirements are mastering the technology of Pandora by doing the following:
12 Assault Rifle kills
11 Pistol kills
10 Shotgun kills
9 SMG kills
8 Sniper Rifle kills
7 Melee kills
6 Critical hit kills
5 Explosive kills
4 Shock kills
3 Incendiary kills
2 Faces melted (corrosive kills)
1 Grenade kill
Wanted: Sledge (Silver) – Killed Sledge
Storyline mission, can’t be missed. He might have a big shield, but once it’s down using damage over time by lighting him on fire is a sure way to take him out. Keep your distance, his unique shotgun is quite powerful due to the +10000% burst fire. Sledge’s Shotgun is also useful for launching cooperative players up to hard to reach areas by shooting them while in mid-air.
Wanted: Krom (Silver) – Killed Krom
Storyline mission, can’t be missed. If you’re overpowered, you can simply snipe him off the turret. Otherwise it’s generally easiest to reach him by taking the right hand path initially and following it (which criss-crosses back and forth), using cover to work your way up and take him out up close. Krom drops a special repeater called Krom’s Sidearm, which always has x3 electricity on it and fires three round bursts while zoomed.
Wanted: Flynt (Silver) – Killed Flynt
Storyline mission, can’t be missed. You’ll have to fight his bodyguards, Hanz and Franz first (SNL, anyone?), and then him. Fire elements work well on his guards, and Flynt too, but watch out for Flynt’s special weapon which fires a mass volley of rockets. Dazing Flynt will make it incredibly easy to side step these rockets and take him down. He drops the “Boom Stick” (Army of Darkness, anyone?) which shoots 6 rounds of rockets with one pull of the trigger. Groovy.
Destroyed the Hive (Silver) – Kill the Rakk Hive
Storyline mission, can’t be missed. He’s pretty simple, keep your distance and hit him hard in the eyeballs. If you go down fire wildly in the air to hit the Rakk for a second wind. Note that while this mission is active, “Another Piece Of The Puzzle”, you can head to New Haven to find a hidden basement where the Rider rifle can be found. Completing the mission locks this door again.
Destroyed the Destroyer (Gold) – Kill the Vault Boss
Storyline mission, can’t be missed. The final boss – he has a lot of health, but is fairly easy to fight. Take cover behind the rocks and pillars and hit his weak points, which include the giant eye and mouth area of the monster. If he shoots out the large purple tentacles shoot the weak points on them right away, or they’ll lob spikes at you.
Speedy McSpeederton (Bronze) – Race around the Ludicrous Speedway in record time
In the Dahl Headland you’ll eventually get the mission “Death Race Pandora,” which will lead you to the Ludicrous Speedway. It’s not clearly labeled, but a look at the map reveals an obvious looping area in the south west area of the Headlands. Making the loop in under 31 seconds will unlock the trophy, and with no visible timer you’ll just have to keep trying until the trophy pops. If you’re having trouble try driving clockwise, making the first left on the south end, leaping of the ramp at top speed to take the right hand uphill path where the track splits in three. Use your boost wisely and the trophy should come easily.
You call this archaeology? (Bronze) – Applied an elemental artifact
Elemental artifacts are class specific items that when used modify your character’s special ability with an elemental effect (fire, electricity, corrosion, or explosive). The earliest reliable place to find one is through the mission “Shock Crystal Harvest” found at the Fyrestone bounty board. Completion of the mission rewards you with a Shock Artifact. Find it in your inventory and hit X to apply it. Note that additional artifacts may be found and used to acquire more power or different elements, and they may be switched on and off freely by clicking the elemental diamond in the skill tree menu, to the left of the main skill.
Ding! Newbie (Bronze) – Earned level 5
This should come naturally, see “Ding! Champion.”
Ding! Novice (Bronze) – Earned level 10
This should come naturally, see “Ding! Champion.”
Ding! Expert (Bronze) – Earned level 20
This should come naturally, see “Ding! Champion.”
Ding! Hardcore (Bronze) – Earned level 30
This should come naturally, see “Ding! Champion.”
Ding! Sleepless (Bronze) – Earned level 40
This should come naturally, see “Ding! Champion.”
Discovered Skag Gully (Bronze) – Discovered Skag Gully
Storyline related, can’t be missed. T.K. Baha will assign your first mission there.
Discovered Sledge’s Safe House (Bronze) – Discovered Sledge’s Safe House
Storyline related, can’t be missed. Dr. Ned will assign your first mission there.
Discovered Headstone Mine (Bronze) – Discovered Headstone Mine
Storyline related, can’t be missed. Mission assigned after acquiring ‘keys’ in Sledge’s Safe House.
Discovered Trash Coast (Bronze) – Discovered Trash Coast
Storyline related, can’t be missed. Found after completing Jaynistown missions.
Discovered The Scrapyard (Bronze) – Discovered The Scrapyard
Storyline related, can’t be missed. Found after talking to Tannis in the Rust Commons West.
Discovered Krom’s Canyon (Bronze) – Discovered Krom’s Canyon
Storyline related, can’t be missed. Found after completing missions for Crazy Earl in the Scrapyard and Treacher’s Landing.
Discovered Crimson Lance Enclave (Bronze) – Discovered Crimson Lance Enclave
Storyline related, can’t be missed. Found after defeating Flynt in the Salt Flats.
Discovered Eridian Promontory (Bronze) – Discovered Eridian Promontory
Storyline related, can’t be missed. Found after restoring the Echo system in Crimson Lance Enclave.
Ding! Champion (Bronze) – Earned level 50
This is fairly straightforward – keep killing things at your level or higher, complete quests, and complete challenges to gain experience. There are however a few faster ways to do this. First off, complete the game (should be around level 35 beating the game for the first time). Afterward you can exit and restart a game in Playthrough 2, which starts at the beginning with enemies around level 35. Make your way to the Eridian Promontory to fight the plentiful Guardians, who give the most experience of any non-boss enemy in the vanilla game (electric based weapons make short work of their shields).
Alternatively join a game hosted by a much higher level player – their kills will earn you massive amounts of experience greatly increasing the speed of levels earned.
See “Ding! Overleveled to 11” if you have The Secret Armory of General Knoxx.
Get A Little Blood on the Tires (Bronze) – Killed 25 enemies by ramming them with any vehicle
After activating the Catch-a-ride in Fyrestone you can acquire the mission “Get A Little Blood on the Tires” from the bounty board (not required, but recommended) which asks you to run over 10 enemies. Do so, and then run over 15 more. Squish!
Rootinest, Tootinest, Shootinest (Bronze) – Killed 5 Rakk in under 10 seconds
If you see any Rakk flying over head, shoot it, and watch as the rest of the flock gathers and swoops toward you. Fire directly into the flock with a rapid fire weapon or a shotgun and this trophy should pop. Easily earned in the Arid Badlands when Shep Sanders gives the mission “Get the flock out of here!”
Pandora-dog Millionaire (Silver) – Earned $1,000,000
Sell guns – lots of them. Most easily earned late in the game when you can find level 50-69 guns worth $1,000,000 or more a piece (Killing General Knoxx in DLC3 drops a reliably valuable pistol – “Knoxx’s Gold”)
Fence (Bronze) – Sold 50 guns to a shop
Sell guns! You’ll want to do this early on anyway to earn money for ammo SDUs.
Can’t We Get BEYOND Thunderdome? (Bronze) – Emerged victorious from an arena match
Arenas are scattered throughout the game for player vs player fighting. You will need another player either online or in splitscreen for this trophy. The first arena in the game can be found in the Arid Badlands, right next to the objective for the mission “Blinding Nine-Toes”. One of Tannis’ hidden journals is also hidden right next to it, with a large neon sign saying “Arena” hanging right over the entrance, which is down a small set of stairs.
Duel-icious (Bronze) – Won a duel against another player
Duels can be initiated at any time by melee hitting another player (click R3) to challenge them. The other player must melee back to accept. This can be done online or in splitscreen.
Group LF Healer (Bronze) – Rescued a groupmate from death in a co-op game
Self explanatory. Simply run over to a downed teammate and hold square to heal them. +100 experience!
There’s No “I” In “Team” (Bronze) – Completed 15 missions in co-op
Complete 15 missions in splitscreen or while online with someone else.
United We Stand (Gold) – Defeated the Rakk Hive, the Vault Boss, Sledge, Krom, or Flynt in a co-op game
Can be earned in conjunction with their respective trophies. These boss fights are not repeatable, so make sure you fight at least one with a friend in Playthrough 1 or Playthrough 2, or you will need to start a new character.
And They’ll Tell Two Friends (Silver) – Played in a co-op game with either an employee of Gearbox or someone who had this trophy
Viral trophy – simply host a public game or join one in the hopes that another player will have the trophy.
Weapon Aficionado (Bronze) – Reached proficiency level 10 with any weapon type
Weapon proficiencies increase by earning experience while holding the respective weapon type, so this will probably occur naturally. It’s generally a good idea to use your respective classes weapon preference more to increase this anyway, such as smg for the siren, sniper rifles /pistols for the hunter, rockets for the beserker, and combat rifles / shotguns for the soldier.
You’re on a boat! (Bronze) – I bet you never thought you’d be here
Go to Treacher’s Landing and look at the map. In the south central area is a set of elevated platforms, and a large rock arch way on the south west end of this section. Find the archway, walk through it, and look for a small raft like boat docked on the small pier found here. Hop on and earn your trophy! There’s also a hidden easter egg here, if you shoot the yellow, green, blue, and red barrels found in this area in that order (they’re all off in the distance, except the blue one which is right on the boat).
Duelinator (Silver) – Won a duel without taking damage
See “Duel-licious”. Most easily done with a friend who knows to let you win, or in splitscreen while no one is holding the other controller. High level characters also get easy one hit kills against lower level characters, further simplifying this.
Facemelter (Bronze) – Killed 25 enemies with corrosive weapons
Self explanatory – find a corrosive weapon and let them have it. Corrosion is most effective on armored enemies like Crimson Lance or Badass Skags.
1.21 Gigawatts (Bronze) – Killed 25 enemies with shock weapons
Self explanatory – find an electrical weapon and hit ’em hard. Most effective on enemies with shields. Krom reliably drops Krom’s Sidearm, which always has x3 electricity as a property.
Pyro (Bronze) – Killed 25 enemies with incendiary weapons
Self explanatory. The first reliably dropped incendiary weapon is “The Clipper”, a fire element repeater found by defeating Nine-Toes in Skag Gully. The Clipper is extremely useful early in the game against skags and unshielded enemies.
Master Exploder (Bronze) – Killed 25 enemies with explosive weapons
Self explanatory – find an explosive weapon and let it rip. Effective against almost everything as extra damage.
There are some who call me…Tim (Bronze) – Equipped a class mod for your character
Class mods can be equipped starting at level 15, and can first be found at the medical vendors when entering the Dahl Headlands. There is a slim chance an enemy may drop one sooner than that, but if not it’s recommended you purchase one as soon as possible, since you’ll not only earn a trophy but get a significant boost to your skills as well. Note: Skill bonuses from class mods only apply if you already have at least one point invested in that particular skill. Skill bonuses stack on top of maxed skills (i.e. If you have 5/5 quicksilver and equip a mod with +3 quicksilver, it will behave as 8/5 quicksilver.).
Fully Loaded (Bronze) – Rescued enough Claptraps to earn 42 inventory slots
There are 10 claptraps to be rescued in the vanilla campaign of Borderlands. Although you may find more later in the DLCs, it is generally faster and easier to collect the original 10 first. Claptraps only award an SDU in the first playthrough, but due to a glitch the first five claptraps have a chance to give an extra SDU in playthrough 2. Remember that claptraps complain, loudly, about their predicament – so listen for them if you have trouble finding them. They can be found in the following areas:
Sledge’s Safe House – Right before you enter the large boss area you’ll encounter a T junction hallway, with the claptrap laying on the right side next to a red gun chest. Backtrack up the stairs and find the repair kit resting on a pipe near the ceiling. Follow the claptrap after rescuing him, he unlocks a room with a gun chest and several lockers with a high chance of containing revolvers, shields, or class mods (high loot pools).
The Lost Cave – Easily found while doing the Shock Crystal Harvest, this clap trap is laying in the middle of the first area where you encounter bandits. His repair kit is next to the bridge at the end of the cave, resting in a pipe.
New Haven – This claptrap is right next to the bounty board. His repair kit is on a balcony, you’ll need to jump on some tires and then a couple rooftops to get to it. Follow him to reveal a gun chest.
Tetanus Warren – This claptrap is on the left hand side of the first main open area in Tetanus Warren. To find the repair kit head directly north, and do some acrobatics to jump from the left platforms to the canopies on the right, and find it resting on a high shelf.
Scrapyard – After talking to Crazy Earl for the first time he’ll want you to take care of some things in the northern area. Instead head north west (note on the map it’s the large area on the left) to find the claptrap laying in between a couple buildings in a bandit village. To find the repair kit you’ll need to get on top of the cliff directly east of the claptrap – head north, then east, and south again to get to it.
Krom’s Canyon – Similar to the Scrapyard claptrap, instead of heading North to Krom, head directly east, then north to find claptrap (on the map, huge area to the right). He’s laying in between some bandit huts about midway through. His repair kit is up on a tower – loop around on the bridges to get up on the cliff next to it, and carefully jump from this platform to get to the beam the repair kit is on.
Trash Coast – Normally you head north to get to the Rakk Hive here – instead head directly south east. You’ll encounter another bandit encampment where the claptrap is in between some huts. The repair kit is on the end of the large pipe in the area – if you’re clever you can jump up the side of the large trash heap to get on the pipe. Otherwise fight your way further south to go around to the west and get up on the nearby cliff, where you can easily get on the pipe and walk back to the kit.
Old Haven – This one can be found crying in a building in the southwest section of Old Haven. You must first complete the mission “Not without my claptrap!” for him to be visible and to interact with him (although you can still hear him crying if you come near him too early). The repair kit is on a roof directly to the east, you’ll need to jump on there from another roof top.
The Salt Flats – Baron Flynt has a large complex in the middle of this area – head to the east entrance, and once inside head north to find this claptrap. His repair kit is just to the south in a pile of garbage with a mattress. Follow him after rescuing for a gun chest reveal.
Crimson Fastness – You can’t miss this guy – he’s laying in the middle of the main hallway with a bunch of other dead claptraps. Head east and downstairs to find his repair kit laying out in the open. Follow him afterward to a room with 2 gun chests and lockers with high loot pools.
Truly Outrageous (Bronze) – Killed an enemy with the Siren’s action skill
Self explanatory – just get to level 5 to gain your skill, and activate it near enemies.
Careful, He Bites (Bronze) – Killed 15 enemies with the Hunter’s action skill
Self explanatory – just get to level 5 to gain your skill, and activate it near enemies.
Reckless Abandon (Bronze) – Killed 15 enemies with the Berserker’s action skill
Self explanatory – just get to level 5 to gain your skill, and activate it near enemies. Proceed to punch everything.
Down in Front! (Bronze) – Killed 15 enemies with the Soldier’s action skill
Self explanatory – just get to level 5 to gain your skill, and activate it near enemies.