Destiny 2 Leviathan Raid Gauntlet Guide
The Gauntlet
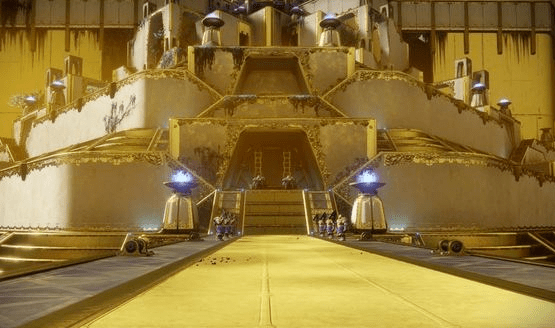
Encounter: The Gauntlet is a circular room, with four circular Platforms that represent the four symbols used throughout the Raid. The outside of the Gauntlet is a track that is essentially a kind of marathon. Adds will spawn until a more difficult Cabal enemy comes out. Two Charges will spawn opposite each other (at Dogs and Chalice) underneath the three Arrows. Players that pick those up will be transported into the outer ring.
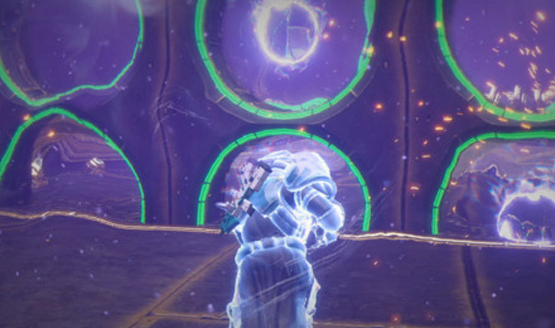
In the outer ring, players will see a red circle when a player is standing on the circular platform corresponding to that section. The outside players must shoot the two Arrows not on the row the Red Ring is on. This will turn the nine circles inside green and a buff will allow the Runner to hold onto their Charge for longer without overloading. The buff spawns in the circle that was red.
On the outside, as soon as a player passes through the rings, a Councilor spawns in a clear bubble beneath the arrows and needs to be killed quickly. If they are not killed they will spawn a projection somewhere in the room that also needs to be killed. If the projection detonates, it’s a wipe. Completing a full lap will transport the Runners to slam their charges in the middle area of the main room. The process needs to be completed three times, with each time getting more difficult for the Runners inside.
After the third time the Runners slam their Charges, all players will pick up a charge from the middle area of the room and be transported inside. Everyone must run a final lap of the outer ring together, returning to the inner room and slamming their own Charges into the middle area to complete the encounter. Nine Charges total must be slammed in the middle, so if the initial two Runners return six, you only need three people to finish at the end.
Strategy: Designate two Runners and their starting locations (either Dog or Chalice). Assign to be people to be each Runner’s support team. For us, the players at Dog and Sun helped the Dog Runner, and Chalice and Axes helped the Axes Runner. Of the two supports, designate one to be Upper and platform duty, and one to be Lower and Councilor duty. This will come into play later. When you are ready, start the encounter by jumping on the four raised platforms.
Kill the adds that come out, with everyone staying at their respective pillar and the two Runners floating to help where needed. After the difficult Cabal is dead (or close to it), the Runners will grab the Charge that spawns below the Arrows at Dog and Chalice. The support teams quickly finish killing adds and then meet at their respective Runner’s initial location. The person assigned to stand on the platform will stay on the circular platform to allow one of the nine rings in front of the Runner to turn red. Runners will call the row the Red Ring is on. Do not shoot that Arrow. Support players assigned Upper will shoot the upper Arrow not called out, and players assigned Lower will shoot the lower Arrow not called.
For example, if a Runner calls Bottom, the Upper assigned player would shoot the Top Arrow, and the Lower assigned player would shoot the Mid Arrow. Arrows need to be shot at the same time for a couple of seconds to allow the inner nine rings to turn green and a buff to spawn. Runners run through the rings and grab the buff to continue.
Platform players will rotate clockwise immediately to the next platform to light up the next Red Ring. Players assigned Councilor need to kill the shielded Councilor that spawns right beneath the Arrows as soon as the Runner passes through the rings, and then moving clockwise to be ready to shoot the next Arrow, and kill the Councilor. you’ll have to do this four times–a full lap– to get your Runner out of the outer ring. Runners run directly to the middle of the room and slam the Charges in the golden fountain.
A note on communication – This part of the communication can get jammed up easily. Keep your comms clear when Runners are in the outer ring. Our Clan is a pretty close knit group, so we know each other’s voices. We were able to simply call the location of the Red Ring and our support teams knew which Runner was talking, even if one of us called Top, and the other called Mid. If voice recognition doesn’t work for you, you may need to work out ways to differentiate your Runners and support teams. You could use Alpha Team and Bravo Team, with the Runners calling “Alpha Top” and “Bravo Mid“so that support knows who is talking, or use the symbols of the ring wall you are coming to, ie. “Sun Mid.” However you decide to do it, be consistent, and keep clear communication for this portion.
After three times of repeating this process, getting significantly harder each time (watch those holes!), you should have six total Charges slammed. Six more will spawn in the center area, and all players need to quickly grab one. This teleports each player to the outer ring to run the obstacle course, but only four of the nine circles will have the buff that allows the Charge not to explode. This means that at least two players need to skip every other one. For ease, we went three and three. Three people agreed to skip first, and the other three would skip second. Call out which buff you are going for so players don’t collide going for the same one, ie. “I’ve got “Mid Right!” Mistakes can be made here. You have plenty of time to run the circle, and only three players need to reach the outside to slam their Charge and complete the encounter.
The chest with rewards is outside of the center area. If all of you are in the center area the elevator may take you back down before you can collect your rewards. Don’t panic. Your rewards will go to the postmaster.
Hub Chamber/Castellum
Repeat the Castellum encounter, this time for the Chalice door. You will not collect rewards for this fourth time even though a chest spawns. You can only collect one chest of rewards per character per week for this encounter, no matter how many times you complete it.
Navigate quickly to any part of this guide:
- Raid Intro and Need to Knows
- Castellum/Entry Hub Guide
- Royal Pools Guide
- Pleasure Gardens Guide
- The Gauntlet Guide
- Emperor Calus Guide
- Rewards/Raid Vendor
Note: Keep in mind that you may need to adjust strategies for your group. The strategies posted are how my fireteams have managed to complete each encounter, and they now seem to be widely accepted by the Destiny community. Communication with your group is the key.