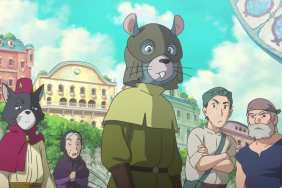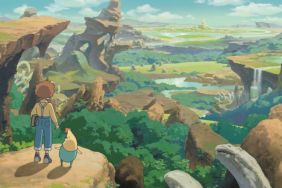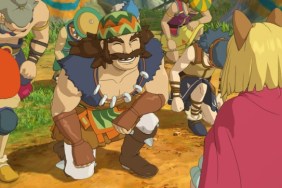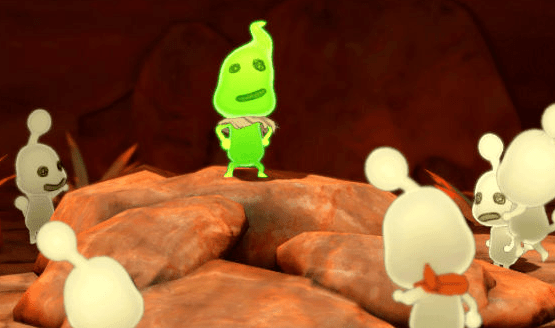
Ni no Kuni II’s higgledies are small elemental creatures that support you in battle with healing and attacks. There are 100 of them to collect, and though you don’t need all of them for Platinum, you will need to collect the vast majority. Many of them can be cooked up using the Higglery in Evermore, but to get the No Stone Unturned Trophy, you’ll have to find all 30 Higgledy Stones scattered throughout the world. To assist you in that task, we’ve got our Ni no Kuni II Higgledy Stone locations guide, which also details which item can lure each higgledy out.
Ni no Kuni II Higgledy Stone Locations Guide
Cloudcoil Canyon
- Cloudcoil Canyon – Filigree the Flighty: Give Munchy Nut. The first one you will come across. Along the main path in the Slitherslide Trail.
- Cloudcoil Canyon – Larrican the Leafy: Give Prism Pepper. At the end of Sidewinder Gorge, use the leaf to leap up. Follow this trail along until you come to two more plants that need spells cast on them and jump to the top. In the boss battle area here.
- Wyvern’s Den – Tove the Tenebrous: Give Single Cream. After entering, hug the right wall and move forward. You can’t miss it.
Near Evermore
- Jumblewoods – Twinkle the Twee: Give Rugged Fur. Keep to the right after entering. Behind the Higgledy man, to the right.
- Jumblewoods – Popple the Pure: Give Slumbergull Feather. Take a left after entering, then a right at the next big fork. At the back of the area farthest from the entrance.
- Tightfit Cavern – Frumious the Flammable: Give Hardwearing Wool. Just to the left after entering.
Near Ding Dong Dell
- Crosswater Cavern – Motley the Menace: Give Snow-White Thread. Directly north of Auntie Martha’s cottage there is a bend in the river. Cast the Bridge spell near here to enter the cave. Head straight for the back until the cave forks left and right. Take the right path and hug the right wall. In an outcropping in this end area.
- Old Well – Bawbee the Bandit: Give Blossomwheat. In a dead end in the Upstream Tunnels portion of the map.
- Old Well – Dimity the Dastardly: Give Forked Tail Bone. In a dead end in the Downstream Tunnels portion of the map.
- Tumbledown Shrine – Tilly-Loo the Twinkly: Give Clear Prism. After entering, take three right turns (one at each fork). The stone is in the back of the last area.
Northern Islands
- Crooked Cavern – Slithy the Spelunker: Give Glacier Crystal Cluster. Walk straight to the back of the area. Go straight at the first fork and right at the second. Stone can be found in a small dead end carve out by hugging the right wall.
Calmlands
- Shiverwood Shrine – Dirge the Dismal: Give Twisty Bone. Head along the path to the back of the area. Take a right at the fork. The stone is in the back of the final room.
- Forest of Niall – Phantasmagoria: Give Nightmare Prism. In the Hard Woods area of the map, go to the northern most point.
- Forest of Niall – Mutton-Bane the Mushy: Give Gunkshrooms. Head to the Dice Factory. The stone is in the area in front of the building.
- Unsung Shrine – Whiting the Lighting: Give Heavenly Wonderwater. Use the Rejuvenate spell to bring the shrine back. Take a right, then a left and head to the back of the last room.
- Death’s Door – Gabardine the Gawker: Give Knight’s Brocade. Take a left at the first fork to find the stone.
- Hidey Hole – Mimber the Meanderer: Give Sackcloth. Just to the right after entering.
Makronos Island (Near Hydropolis)
- Dampshoe Cave – Tundle the Tropical: Give Coral Huebloom. Take a left at each fork, and the stone is on the left of the final room.
- Seaspray Tunnel – Dishcloth the Dragony: Give Briar Coral. Just to the right after entering.
- Abyss – Haddock the Fishy: Give Bright Button. At the 1000 Fathoms Deep portion of the map, take the water jet on the far left side of the map which will shoot you to the right side. Fall down one level to find the stone.
- Abyss – Clambunctious the Calm: Give Bighorn Shell. At the 3000 Fathoms Deep portion of the map, take the water jet that shoots you back up to the previous level. The stone is on this platform.
Near Broadleaf
- Shrine That Time Forgot – Boss-Woss the Bruiser: Give Bolt Eagle Feather. Use the Rejuvenate spell on the shrine. Head straight at the first fork. The stone is in the back of this room.
- Sublime Shrine – Unkimmon the Uncommon: Give Coarse-Grained Lumber. Ignore all dead ends and head to the back of the area. At the final fork, take a right to find the stone.
- Fathomless Forest – Bumblebizz the Blowy: Give Fine Fur. Head for the end of the area. The stone is along that path in a small alcove.
- Broadleaf Dynafloor No. 2 – Topturvy the Testy: Give Scented Sap. Use the red console so that the path to the left of the red console is accessible. Pass the first blue console and take the stairs up to the second blue console. Use it, then continue to the left. head across the blue platforms to the back platform attached to the wall of the area to find the stone.
- Broadleaf Dynafloor No. 3 – Slingsby the Scorcher: Give Whole Milk. On the upper floor, use the blue console and then the red console. Use the red platform to cross to the small platform to the upper portion of the map where the stone is.
Frost Planes
- Ice House – Malignity the Indignity: Give Sturdy Bone. Use Rejuvenate on the Shrine. Head straight for the back of the area. Go straight at the fork to see the stone right in front of you.
- Freezybones Cave – Benison the Bright: Give Enigma Prism. Go straight at the first fork. When the path opens up to a room, check the alcove to the left.
Desert
- Bleachbone Shrine – Teakettle the Toasty: Give Fluffy Cloth. Take all left turns to find the stone at the end of a hall.
- Sunshade Shrine – Vorpal the Volcanic: Give Sunnysmile Cotton. Use Rejuvenate on the shrine. Take a left, then a right, and another right, and the stone is in a little nook on the right side of the room. The item can only be obtained from a Level 3 Wondrous Bazaar or the 10th and final Dreamer’s Maze.
Did our Ni no Kuni 2 Higgledy Stone locations guide help you with the No Stone Unturned Trophy? We’ve got a few other guides that will help you get some of the tougher Ni no Kuni II Trophies, including how to best use the kingdom builder and a Songbook Locations Guide.
Don’t miss our review of Ni no Kuni II, which we called a near-perfect RPG. Will you be going for the Ni no Kuni II Platinum Trophy?