When the PS4 was first announced, we were all stoked about the size of the hard drive. We didn’t need too much more than 500GB for the PS3, so surely that will be enough for this new console! Oh how foolish we all were. The PS4 games take a megaton of space, even if you’re using discs. It doesn’t take long before you’re playing Sophie’s Choice and determining what must be uninstalled to make room for the new shiny toy. We thought Sony learned their lesson, but then they announced the PS4 Slim with a 500GB hard drive as well. Even the PS4 Pro only has 1 TB of space available! Considering how much space these 4K and HDR compatible games will undoubtedly take, Sony still hasn’t learned their lesson fully.
Oh well. At least you can upgrade the hard drives. Before you tackle this task, you will need the following items and the realization that this is a far easier process than you think. Even if you’ve never held a screwdriver in your hands before, I promise you can do this DIY job. And you’ll feel like you can take on any DIY project after completing this one (but please don’t).
- Your PS4 or PS4 Slim
- 1 Phillips screwdriver
- 1 2.5-inch SATA HDD (2 TB is the limit!)
- 1 PC with an internet connection
- 1 USB flash drive (with at least 8GB of free space)
- 1 external hard drive with a USB connector
Upgrading PS4 Hard Drive
Need to upgrade the hard drive on your PS4 Slim? Check out the next page!
PS4 HDD Upgrade
-
How to Upgrade Your PS4 Hard Drive
-
Backup Your Original Hard Drive
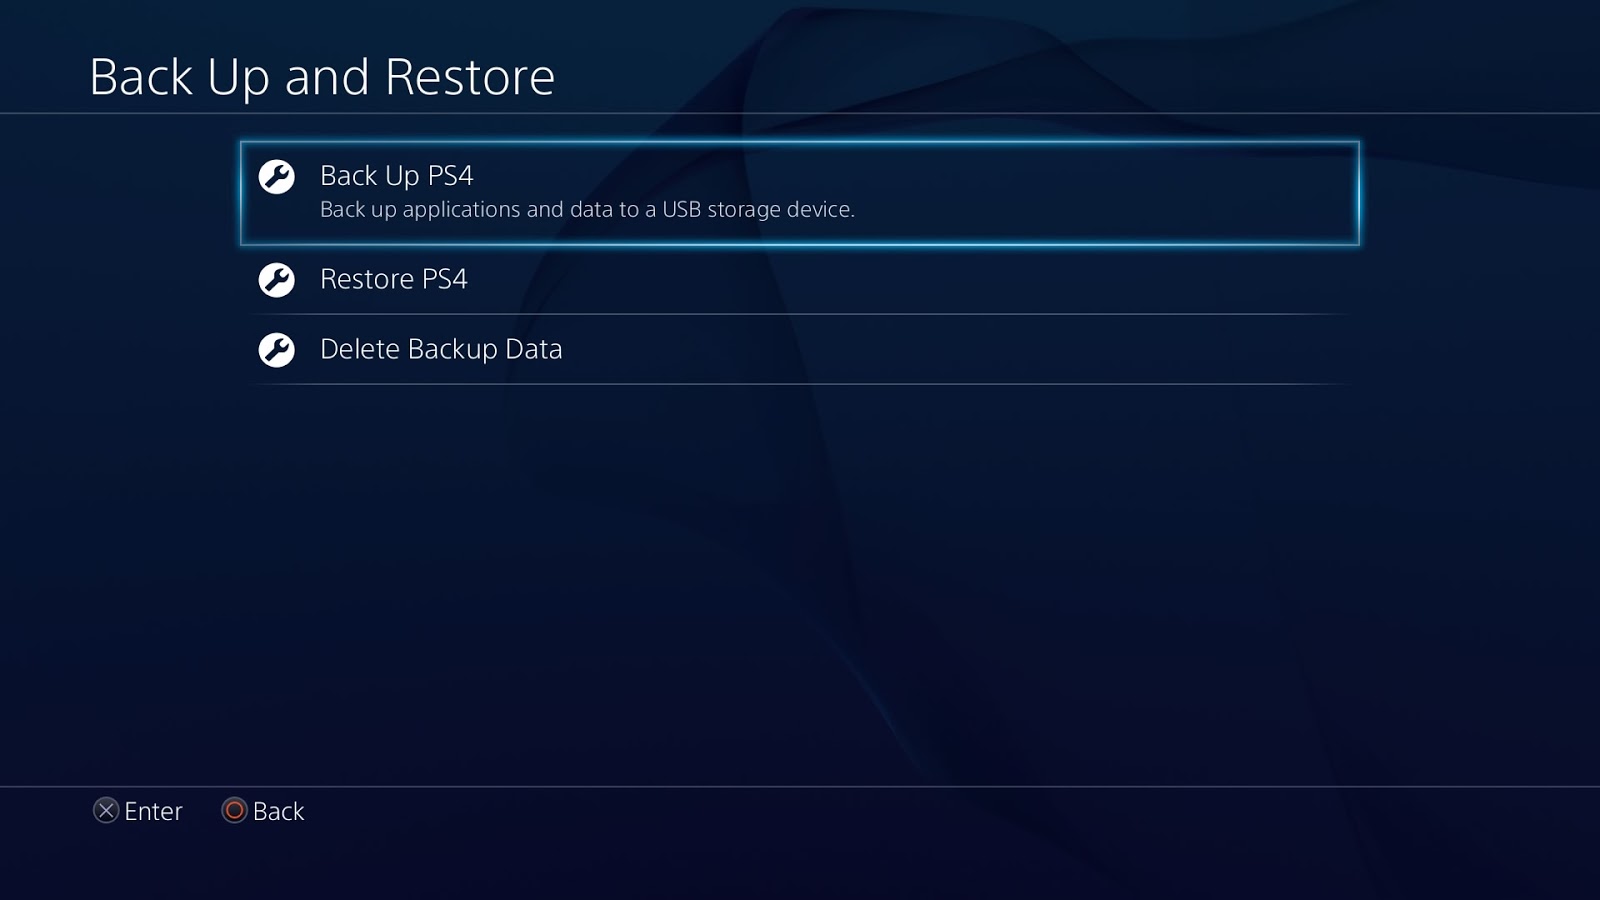
First things first; backup your original hard drive to your external hard drive. If you have a smaller flash drive instead of an external HDD, backup your game saves, user data, and any other important info you want to transfer over. For your digitally downloaded games, if you don't have the space to back them up, you'll have to re-download them onto the new HDD. If you have a data cap with your Internet service provider, you will probably want to invest in an external hard drive backup instead of a flash drive.
If you need step-by-step instructions on how to do this, we happen to have a lovely Help Desk on this topic!
-
Slide the HDD Bay Cover Off
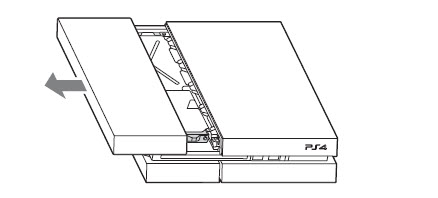
After you have completely unplugged your PS4, slide the bay cover off the console and set it aside. Sometimes this is hard to slide off, and for others, it's incredibly easy. Grip with both hands and don't fear you will break it. It's sturdier than it feels it is.
-
Removing the HDD for Models CUH-1001 through CUH-1115
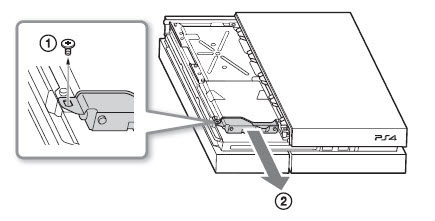
Check your PS4 model number, which will be on the back of the system. If your model number is CUH-1215, skip to the next step.
For models CUH-1001 through CUH-115, unscrew the lone screw connecting your HDD to the console. Pull the HDD mounting bracket toward you to remove it. Skip the next step and go directly to removing the HDD screws.
-
Removing the HDD for Model CUH-1215
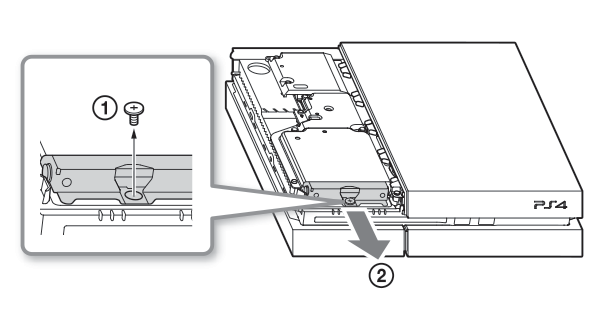
This model is pretty much the same as the others, but it looks slightly different. It also has one lone screw that needs removal. Pull the HDD mounting bracket toward you to remove it.
-
Remove and Replace Original HDD
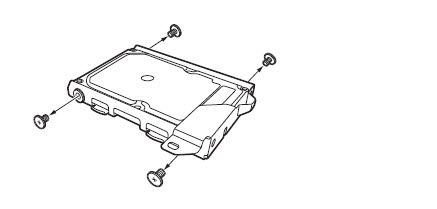
- Remove the four screws holding the hard drive in place in the mounting bracket. Do not remove the rubber inserts from the screw holes.
- Carefully slide out the original HDD.
- Slide in new hard drive, and replace the four screws to secure the HDD in the bracket.
- Insert the HDD back into the bay. Replace the lone screw to attach it.
-
Restore PlayStation Operating System
Before you turn on your PS4 with its new hard drive, you will need to download the latest operating system onto a USB flash drive. Download it on your PC from their website, move it to the flash drive, and then insert the flash drive into the PS4.
To install the OS from the flash drive, turn on the PS4 in safe mode. Hold down the power button for seven seconds to power up safe mode. Plug in your PS4 controller to the console (wireless is disabled), and then follow the on-screen prompts.
Lastly, after the OS is installed and raring to go, it's time to upload your user data, game saves, etc. by restoring from your backup. Isn't it great our Help Desk has that info too?