
Destiny 2 Leviathan Raid Pleasure Gardens Guide
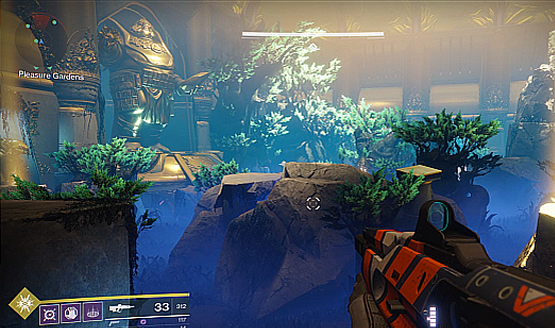
Pleasure Gardens
Encounter: This is a stealth encounter, so lower your weapons and channel your inner Metal Gear Solid. There are six Royal Beasts that will roam the lower forest area. Four people will need to take the Pollen Pods located in the safe room to lit up flowers around the lower forest, while two upper players use the Prisms in the light areas to blast the pollinated flowers. This will create a damage multiplier for any players in the lower area. One pod will add x1, two will add x5, three will add x7, and all four will make it a x12 per flower blasted. Keeping all four Pollen Pod players together will create a bigger multiplier.
If the Royal Beasts notice any players, or after a certain amount of time, they will run to the pre-specified locations and begin to howl. After about thirty seconds of howling, anyone that is outside of the Safe Room will die (the same place that the Pollen Pods spawn). Players need to jump up on top and drop down through the hole, the doors will be closed.
During the howl, players need to damage the Royal Beasts, using the multipliers from the Pollen Pods to do more damage. The Safe Room can be used three times, for a total of four damage phases. The fourth phase will result in a team wipe if all Royal Beasts are not killed, as the Safe Room will be locked. For every Royal Beast killed, the time it takes until the start howling shortens. When all six Royal Beasts are killed, the encounter is done.

Strategy: Designate a team of four to run the Pollen down in the forest, and two others to run Prisms on the rocks and platforms above. The two Prism runners will be the navigators for the team. The first step is to learn the lay of the land. The flowers can light up in eight places around the map. There are six around the outer walls that we designated as close (the ones immediately outside the Safe Room), mid (the ones against the side walls), and back (the ones against the back walls) on either right or left. Directions are oriented from standing in the Safe Room and facing out. There is one inside the big tree area on the left we called Tree, and one in the crack in the rock to the right we simply called Crack. Your groups may have differing names for these, but learn their locations and how to get to each one. As always, stay consistent.
Grab the two Prisms to start the encounter. The other four players will drop into the Safe Room and grab the four Pollen Pods. Have one navigator head to the right side and one to the left and call out where the flowers are lit up a pinkish/purple. The Royal Beasts will be roaming around the area and the four carriers need to stick together and stealthily pass by the hounds. Our group found that having the Pollen Pods head left first allowed for the most favorable positioning of the Royal Beasts, but your mileage may vary.
The Royal Beasts seem to have a long cone of sight in front of them, but limited ability to detect players that are behind them. Try to avoid sprinting as it seems to attract their attention. When a Pollen Pod reaches a lit up flower, it will bloom for a few seconds. The Prism players need to be standing in the yellow light areas above the forest floor. Blast the flower when all four Pollen Pods are near it to great a x12 damage buff. When you do this, two Cabal Beast Handlers will spawn from doorways around the room. These are the responsibility of the Prism holders, as Pollen Pod carriers cannot attack.
The goal is to do this four times to get the buff to x48 (or more, if possible), but if the Royal Hounds see a player or you run out of time, it is still doable at x36. It may even be possible at x24, as you have four total damage phases if you use the Safe Room properly. Adjust for your group.
Assign one player to each of the six Royal Beasts for damage. Know your location. The Royal Beasts head to Close Left, Back Left, Tree, Close Right, Mid-Right, and Back Right during the howl/damage phase. Crack and Mid-Left will be empty. Upon being detected or deciding that it’s time to start damaging the Royal Beasts, every player heads directly to their location (again, very important to know the layout). If you are attempting the two phase strategy, do damage with heavy weapons and supers until the Royal Beasts have around one bar remaining on their health. Avoid killing them, as this will shorten the time for the next round of Pollen Pod carrying.
On the second round, do the same thing, rush to the locations and finish off the Royal Beasts to end the encounter. You can extend into third and fourth damage phases if needed, or adjust your strategy by killing some Royal Beasts the first round to make navigation easier on the second. The above method is the one that has worked best for us each time we’ve done it, but adjust for the strengths and weaknesses of your group.
Collect your rewards and head back to the Castellum. Next up is the Gauntlet.
Hub Chamber/Castellum
Repeat the Castellum encounter, this time for the Axes door. You will not collect rewards for this third time even though a chest spawns. You can only collect one chest of rewards per character per week for this encounter, no matter how many times you complete it.
Navigate quickly to any part of this guide:
- Raid Intro and Need to Knows
- Castellum/Entry Hub Guide
- Royal Pools Guide
- Pleasure Gardens Guide
- The Gauntlet Guide
- Emperor Calus Guide
- Rewards/Raid Vendor
Note: Keep in mind that you may need to adjust strategies for your group. The strategies posted are how my fireteams have managed to complete each encounter, and they now seem to be widely accepted by the Destiny community. Communication with your group is the key.